Opening a Position
Both halves of the trade are executed from the terminal: the rate lock on Boros (a single Spread Market position, or two Funding Market legs) and the perp legs through CrossEx. The guided wizard walks you through both in the right order — lock the rate first, then hedge the perps — since Boros price impact is higher and less predictable, so you want the spread secured before committing to the perp side.
Reading the Opportunities scan
The Opportunities tab lists live fixed-rate spreads, each priced at your chosen notional and net of every cost the engine can model.
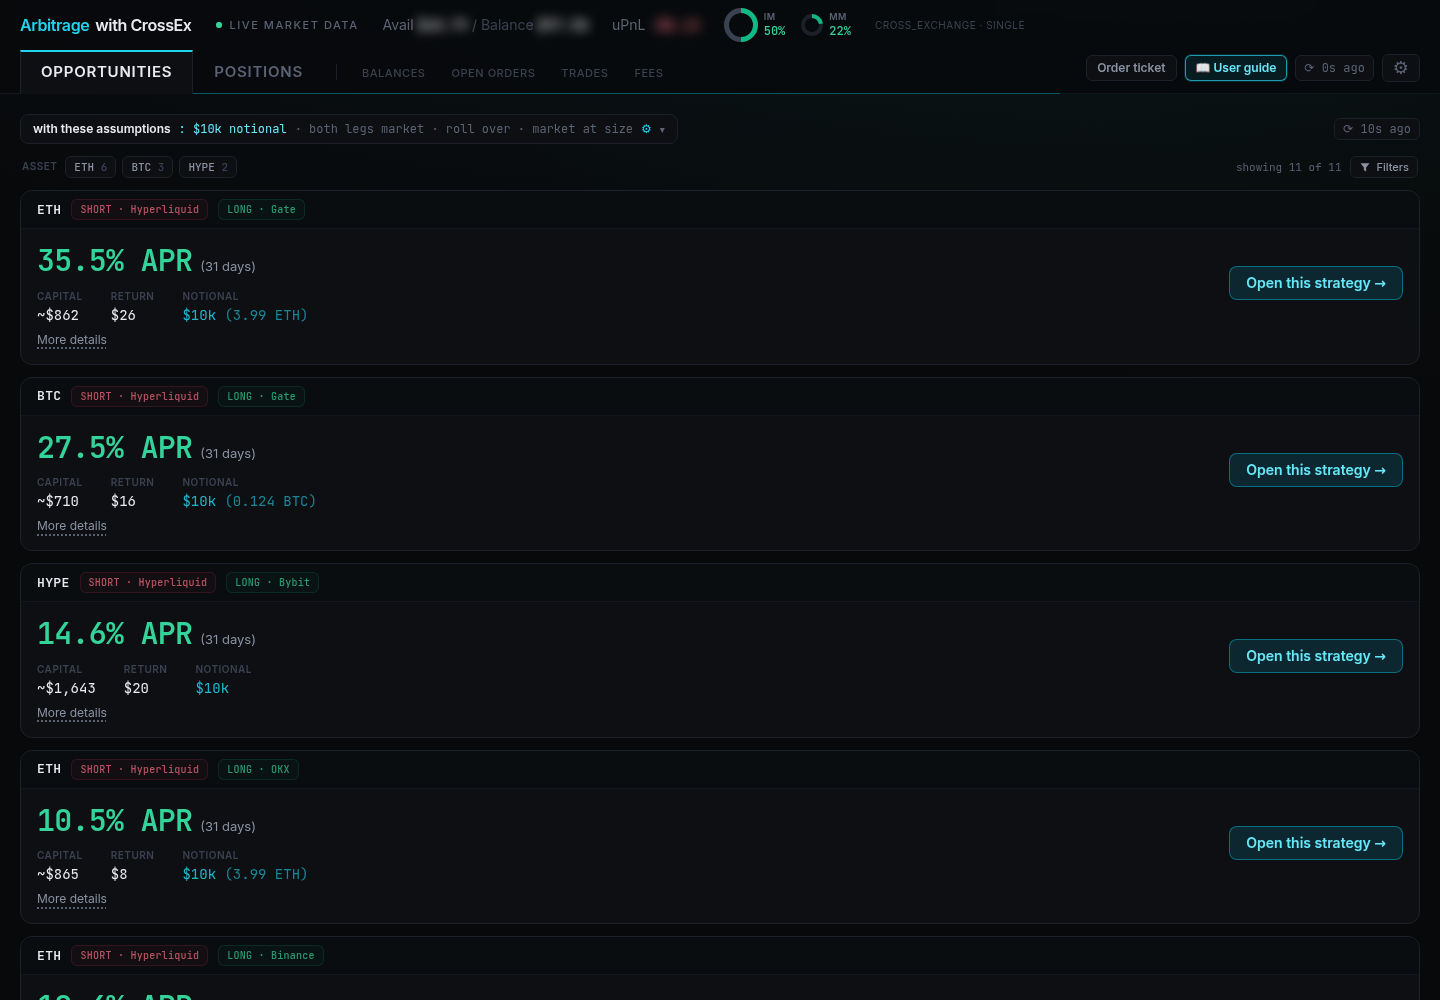
Each card shows the coin, the two venues (which side is shorted and which is longed), the maturity, and:
- APR — the net return after fees, price impact, and slippage, annualised
- CAPITAL — what all the legs actually consume as margin
- RETURN — the estimated profit in dollars over the life of the position
- NOTIONAL — the size each leg is priced at
Adjusting the assumptions
Click the with these assumptions bar to open the panel. Every change re-prices all the cards.
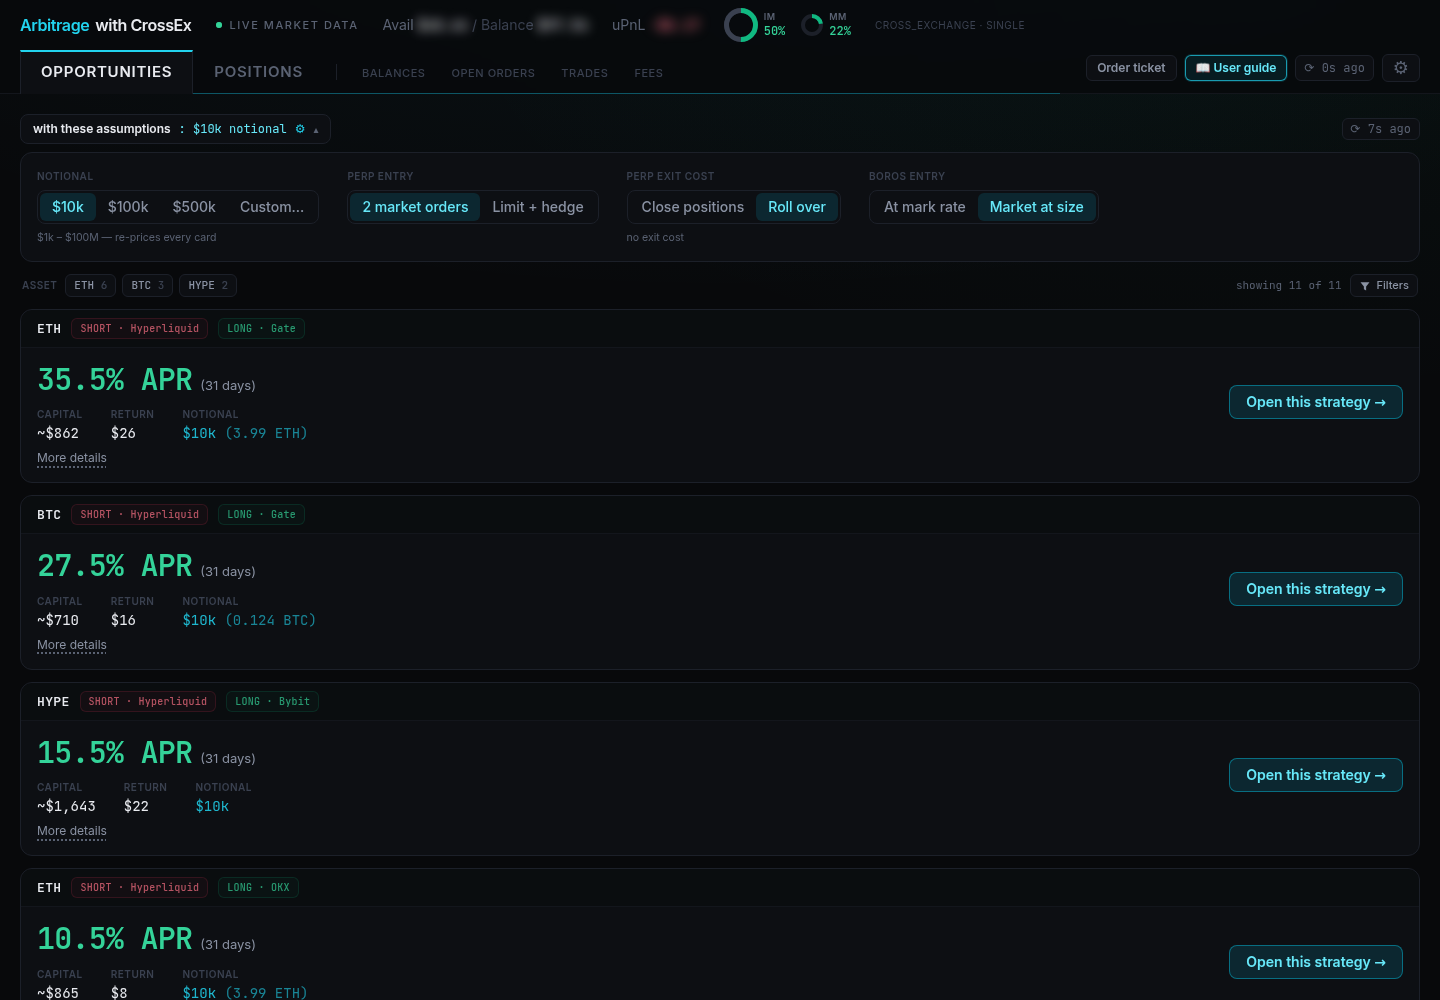
Notional — 100k, 1k to $100M.
Perp entry
- 2 market orders — enter both legs immediately at market.
- Limit + hedge — rest a limit order on one venue, then market-order the other the moment it fills. Saves the maker/taker fee difference, at the cost of execution time.
Perp exit cost
- Close positions — assumes you close the perp legs at maturity.
- Roll over — assumes you keep the perp legs and roll them into the next maturity, skipping a round of perp fees entirely.
Boros entry
- At mark rate — assumes the Boros legs fill with no price impact.
- Market at size — assumes the Boros side (the Spread Market order, or both Funding Market legs) fills via market order at your size.
Your current Gate VIP tier is already factored into every number. A higher tier meaningfully raises the APR on the same trade, since perp fees are one of the largest cost lines.
Seeing the full breakdown
Click More details on any card to see how the number was built.
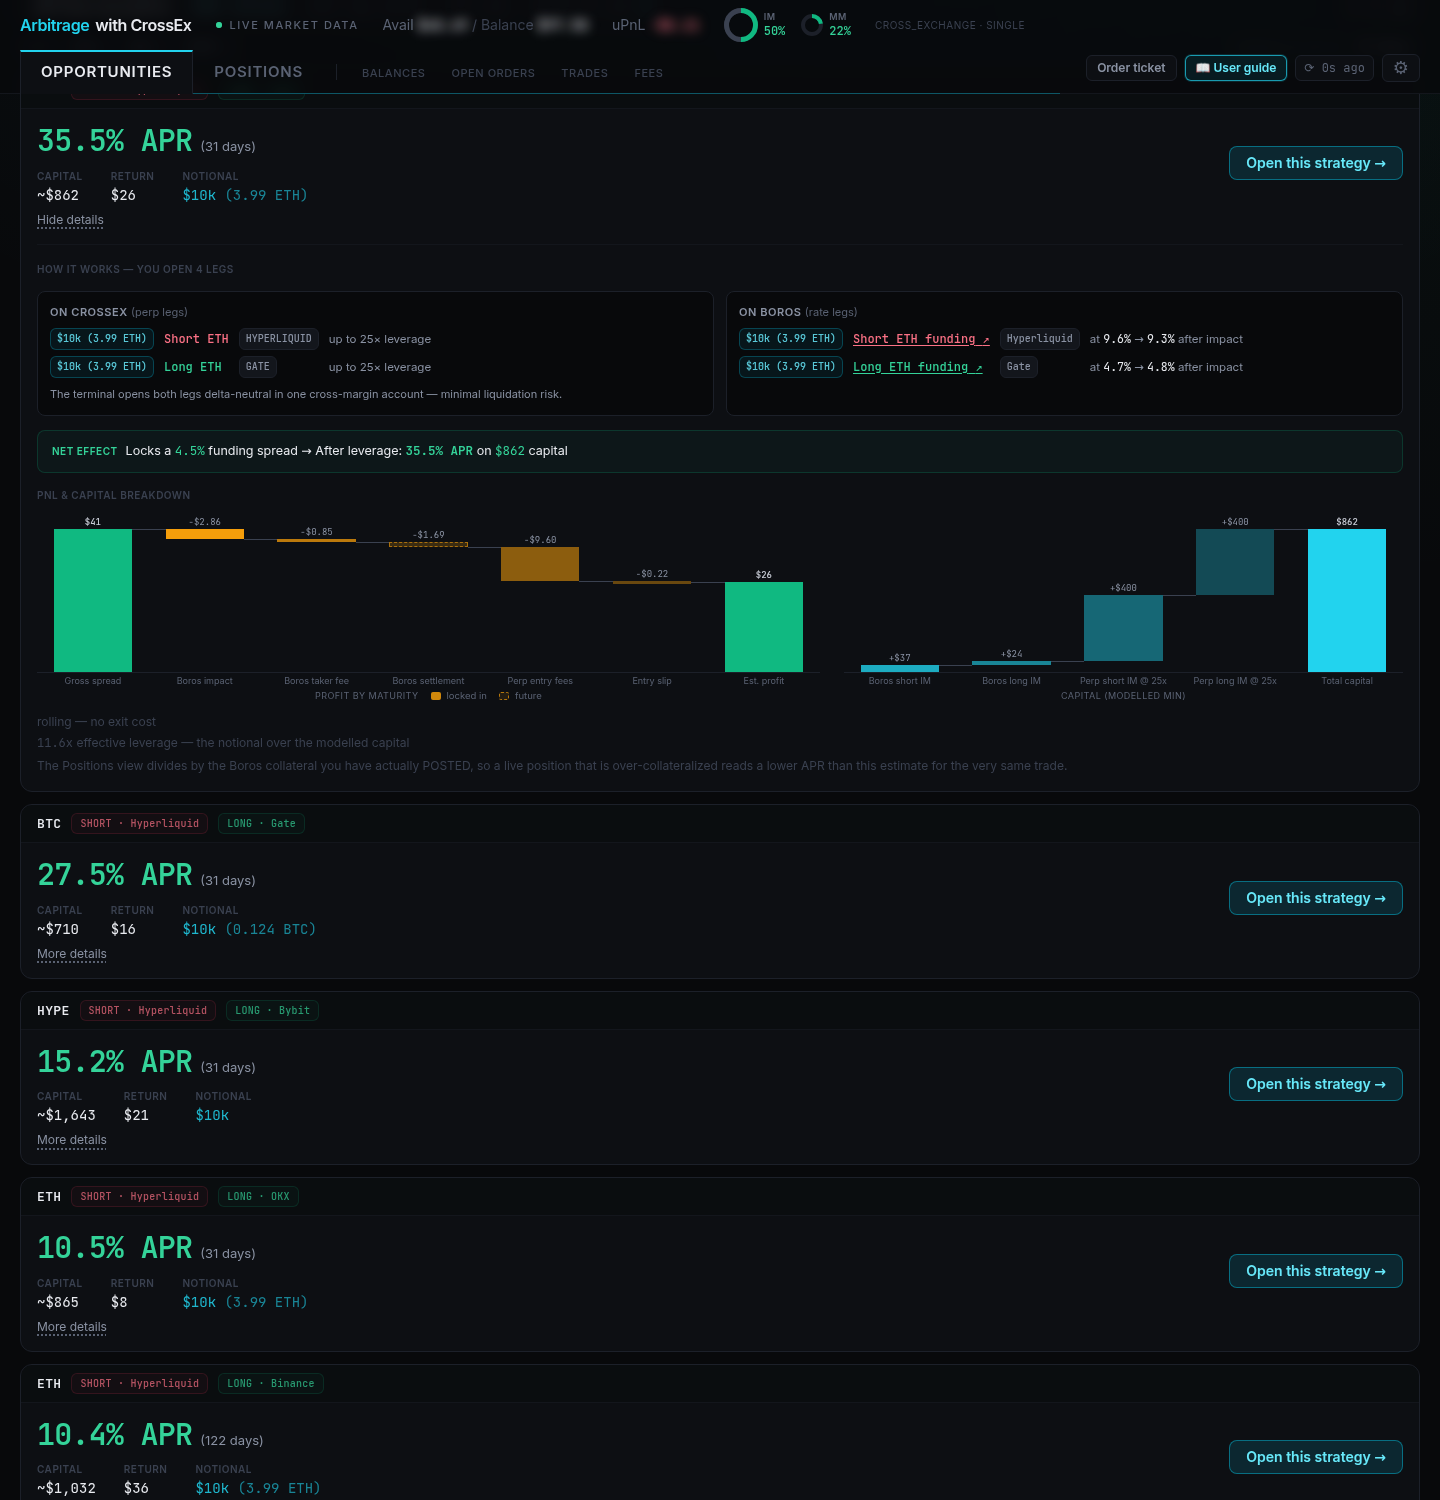
The panel lays out every leg — the two CrossEx perp legs with their available leverage, and the Boros side (one Spread Market leg, or two Funding Market legs) with its rate before and after price impact — then a NET EFFECT line stating the funding spread being locked and the resulting APR on capital.
Below that, two waterfall charts: profit by maturity, itemising the gross spread down through Boros impact, Boros fees, settlement, perp entry fees, and entry slip to reach estimated profit; and capital, showing the initial margin each leg contributes. A Spread Market contributes a single Boros margin requirement.
The APR here is modelled against the minimum capital the legs require. The Positions tab divides by the Boros collateral you have actually posted, so a live, over-collateralised position will read a lower APR than the estimate for the very same trade.
Opening the strategy
Click Open this strategy → on an opportunity. This launches a two-step wizard that carries you through both halves of the trade, with the legs already filled in from the opportunity you picked.
Step 1 — Lock the rate (Boros)
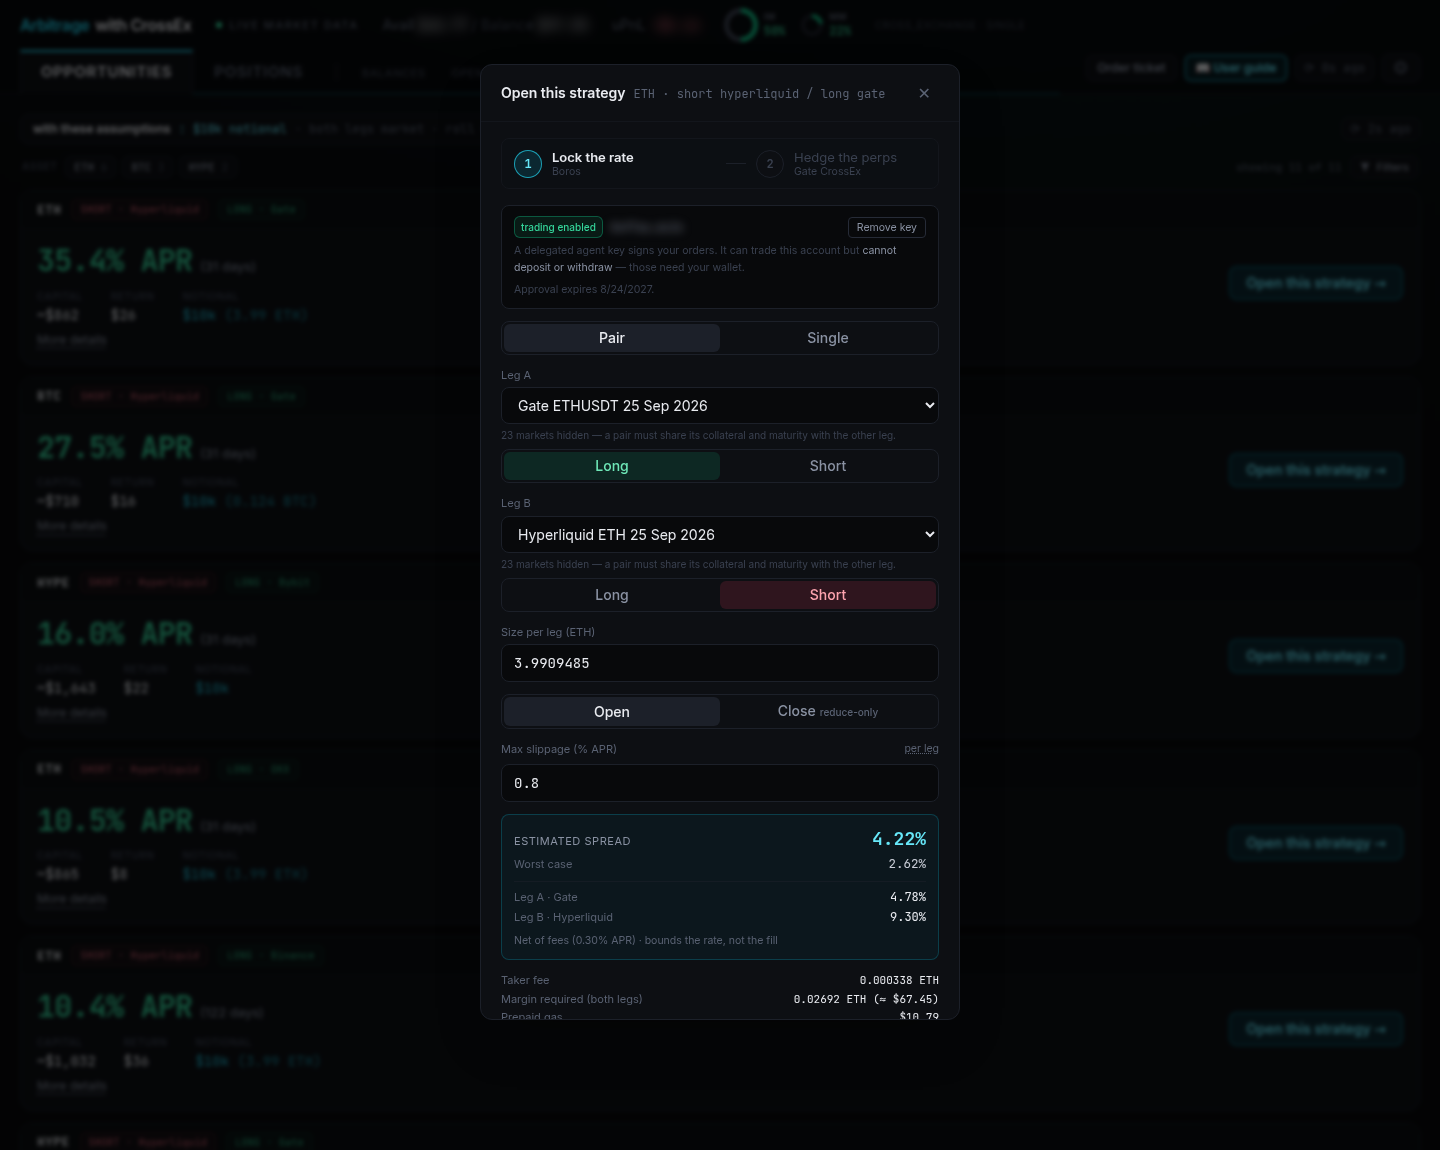
The wizard opens on the Boros step with the rate lock prefilled. When a Spread Market exists for the venue pair, the terminal always uses it, since it needs less margin and has deeper liquidity.
In the terminal, a leg is one position. A Spread Market counts as a single Boros leg, even though the spread itself is built from two funding rates.
- Spread Market — when the opportunity is on a venue pair with a Spread Market, the rate lock is one short on that market. A single order, a single slippage cap, and one margin requirement.
- Two Funding Market legs — otherwise, check Leg A and Leg B. Each is a market and maturity with its own Long/Short side.
Then confirm the Size per leg, keep the mode on Open, and set Max slippage (% APR), which caps how far each leg may fill from the quoted rate.
Before you commit, the ESTIMATED SPREAD panel shows what you're about to lock:
- the estimated spread, and the worst case given your slippage cap
- each leg's rate
- the taker fee, the margin required on Boros, and the prepaid gas
- the resulting position change on Boros
Confirm to send the Boros order (one order on a Spread Market, two on Funding Markets). The wizard then advances to step 2.
For two Funding Market legs, the market dropdowns only list markets that can pair with the other leg — the wizard hides those that don't share a collateral and maturity, and tells you how many it hid.
Step 2 — Hedge the perps (Gate CrossEx)
With the rate locked, the wizard moves to the perp leg. Set the size, then choose an execution mode.
2 market orders opens both legs immediately — simple, and the right choice when you want certainty of fill.
Limit + hedge is the default and saves fees. The maker side is chosen automatically to minimise the total fee bill. Once running:
- A limit order is placed at the maker price — set just beyond the touch by default, and tracking the book until you type a price to pin it.
- Each time it fills, in whole or in part, the filled amount is immediately hedged with a market order on the other venue.
- This repeats until the pair is complete.
If the Convert to taker after countdown (1m / 5m / 15m) expires with the order unfilled, the remainder is cancelled and completed at market. Click Stop before it runs out if you'd rather it didn't. If a resting order is sitting too far from the market, Re-peg to touch moves it back beside the best bid/ask, and you can also re-peg to a custom price.
Execute a small test size first to get familiar with the flow before trading meaningful amounts. For a large position, break it into several executions — five lots of 500k at once — to reduce average slippage. Executing when the market is calm helps too.
Once both steps are done you hold the full position — three legs with a Spread Market, four with Funding Markets — and the Positions tab shows your locked rate and estimated return until maturity.
The order ticket
To trade outside the guided flow, click Order ticket in the header. It opens as a side panel with the same two tickets:
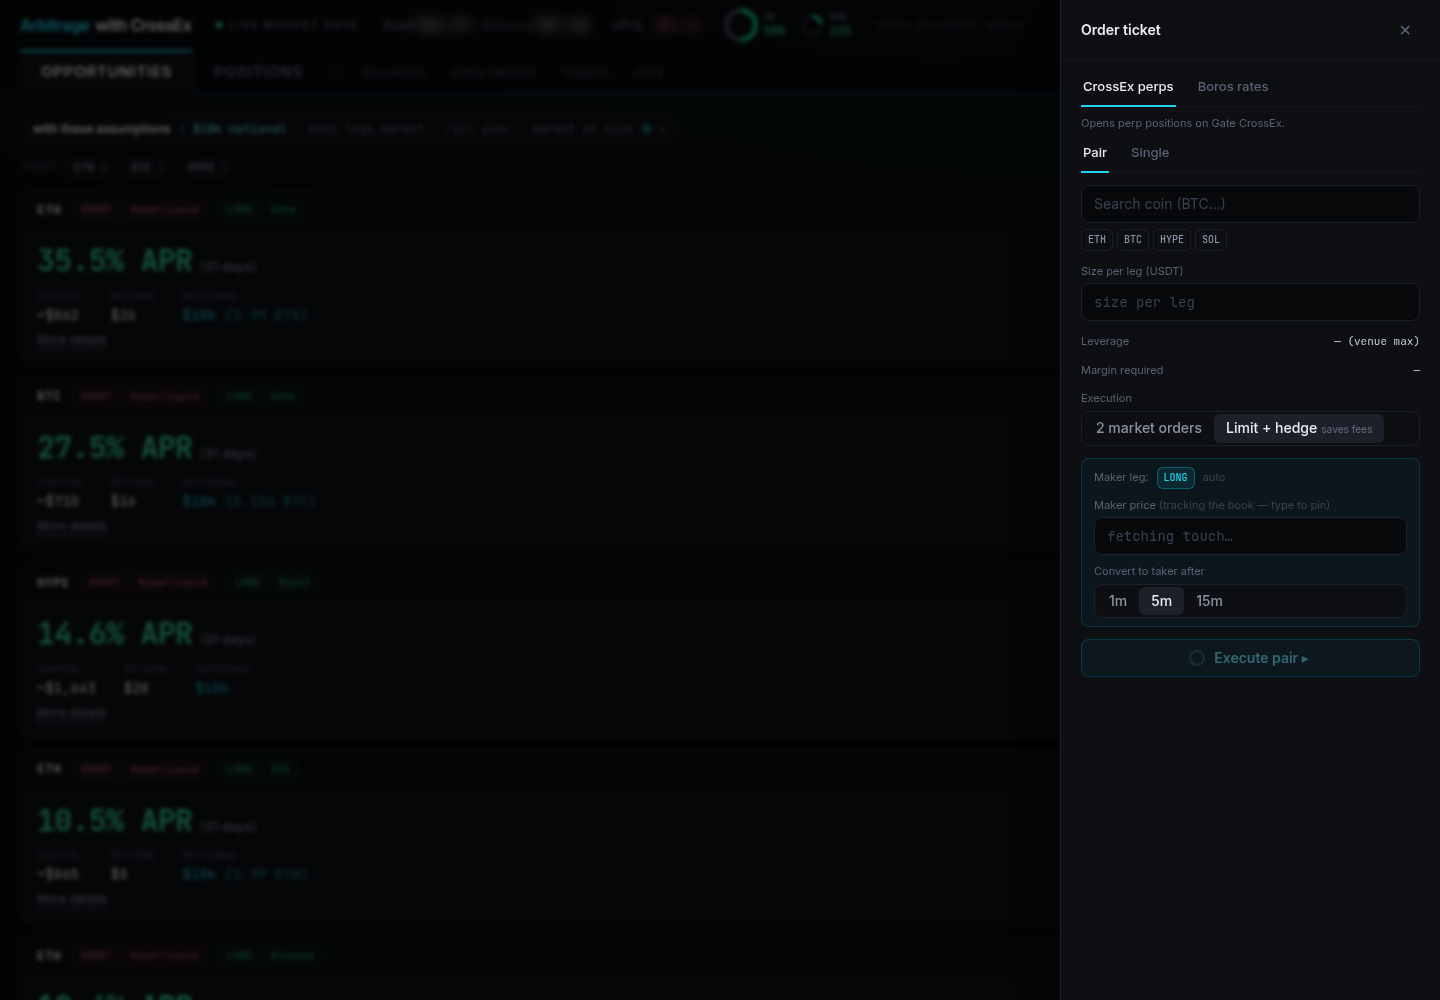
- CrossEx perps — pick a coin, set size per leg, choose the execution mode, and Execute pair. The Single tab opens one leg on its own.
- Boros rates — pick a Spread Market, or two Funding Markets sharing a collateral and maturity; set sides, size, and max slippage, and confirm.
This suits traders who want to set up a perp spread before locking rates, or who want specific limit orders for more advanced execution. If you're new to funding rate arbitrage, use the guided wizard instead.